
Are you looking for tips on how to hide your old wood paneling? Well, here are some great ways to cover up wood paneling and transform your old wooden paneling into something modern and new.
1. Repainting Old Wood Paneling
As they say, repainting is one of the easiest and cost-effective ways to revive any room.
Reminder: wear safety clothing when using paint, paint thinner and paint remover. Open doors, windows, and other exhaust systems in your home. Protect surfaces by placing newspapers or a drop cloth around your painting area.
Preparation
Before you start painting wood paneling, prepare the surface first. Place newspapers or a drop cloth on the floor where you will be working.
Place masking tape along the area of the wall or area of the furniture that you do not want to be painted.
If there is old paint on the surface of the wood panel, remove this layer with some paint stripper and a paint remover tool.
Apply the paint stripper as indicated in the product label and wait until the solution works. You will see that the paint stripper has worked when the paint begins to bubble. After 15 to 20 minutes, the old paint is ready to be removed. Use rubber gloves to protect your hands. Use the flat tool to remove all the paint from the panel.
After you have removed all the paint, use sandpaper (220 grit) to sand all the surfaces of the panels (only if the paneling is rough to the tough).
You will see there are cracks, nail holes and other imperfections along the wood grain. You should fill these with wood filler. You can purchase paintable wood filler in most hardware stores. Apply the wood filler along the areas where there are imperfections, then sand with 220 once dry. You may need to apply the wood filler multiple times to get a smooth flawless wall. After this, you may now apply your first coat of paint.
Painting, finally
Start painting from the top of the panel downwards (not like the photo below 🙂 ) in smooth and even strokes. If you are working with larger panels, a roller would be better so you can save time. For wood paneling along windows and entryways, you should use a 1-inch brush.

After you are done with the first layer, allow it to dry completely for about an hour or two. Apply the next coat of paint when the first layer has completely dry. Darker paneling may require more coats as the wood will absorb your paint quickly.
Warning
Be careful adding too many coats. In some cases, the wood paneling may absorb so much paint that it starts to pull apart from itself. You can use wood glue to put it back together if this happens.

What else can you do with wood paneling?
Wood paneling is out of style so here are some other ways to modernize it. Painting is the first option, but you can still see the wood panels, they are just a new color now. Some alternate ideas are:
2. Wallpaper Over the Wood Paneling
A “simple” way to hide your wood paneling is to wallpaper over it. But there is a trick to it because normal wallpaper will still show the grooves and you need a flat surface for proper wallpapering.
The secret is to use a wallpaper liner (like this) first. The wallpaper liner will hide any imperfections on your walls and it makes your wall nice and flat for wallpapering.
Here are instructions if you decide to go this route: http://www.wikihow.com/Hang-Wall-Paper-over-Wood-Paneling – however, be sure to replace their step 4 (Prime the wood paneling) with my wallpaper liner trick. You don’t need to prime and you’ll get way better results.
Here is a video I put together (with a GoPro strapped to my head and a helpful cat) showing how easy it is to use the wallpaper liner to cover the wood paneling. Also, in this video, I already tried painting the paneling white, but I still wasn’t happy with it, so wallpapering is my second to last resort before totally ripping it out and drywalling.
Materials/Tools used:
- Brewster 92599 Lining Paper Prepasted Lining Paper
- Scissors
- Utility Knife
- Smoothing Tool or a Putty Knife
- Heavy Duty Wallpaper Adhesive
- Paste Brush
- Grasscloth Wallpaper
Some things I learned:
- Remove all metal corner beading before you start! The wallpaper liner will NOT stick to it
- I used a pretty heavy Grasscloth wallpaper. I probably didn’t need the wallpaper liner to hide the gaps in the wall paneling, but I’m guessing it helps the wallpaper stick to the wall better. At $100/roll, I didn’t want to take any chances.
- Putting up the wall liner was really easy! Wallpapering with Grasscloth was a bit hard.
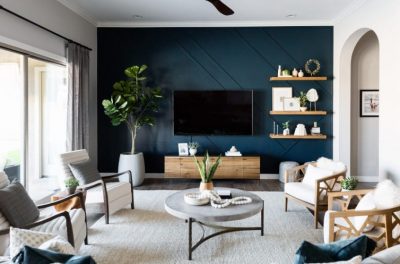
3. Wood Paneling to Wainscoting
This idea involves painting the lower 1/3rd of your wood panel wall white. Then you wallpaper the top 2/3rds of your wall. In between your paint and wallpaper, you add a chair rail to separate them.

This option can give you a classier look to your room without having to pay for expensive wainscoting boards. Read Also: Wainscoting Ideas
Here is a link to my Ideabook on Houzz for more Wood Paneling to Wainscoting conversions.
4. Replace it
You can always replace your wood paneling with drywall. This is the more complicated and messier solution since you’ll need to know how to do drywall. Also, the mud sanding process is really messy and you’ll have sanding dust on everything.
This is the most professional way to do away with wood paneling. Your walls won’t feel thin and cheap. And the room won’t echo as much since wood paneling really reflects the sound a lot.
Let me know what you decided to do and send me pictures. I would love to see how you tackled your wood paneling project.


15 Responses
I like the idea of ‘hiding it out in the open’ as wainscoting.
Yes, but the photo shows the wainscoting not as painted old (cheap) wood paneling, but as some kind of (possibly) true wood paneling or as a type of wide-bead board. It wouldn’t look like that if I tried it with the 60s paneling I want to cover in my basement. I would actually love to have a paneling that looked like the photo.
It depends on the paneling style you have. You can buy paneling sheets, like https://www.homedepot.com/p/EUCATILE-3-16-in-x-32-in-x-48-in-White-True-Bead-Wainscot-Panel-975-891/205669197 (they have lots of other styles too) and nail it in on top of your existing wood paneling.
I have old paneling on some walls in my house. WhAt is the best way to cover it without taking it down
70’s beach Condo
100 % good wood paneling dated
I don’t like the look of painted paneling
Is there a GOOD printable wallpaper
I had a failure at my home the paint soaked into wallpaper opening up all the seams.
Help!! Can’t afford dry wall at this time.
Sure, check your local Sherman Williams, they have tons of samples. Also Amazon has lots to choose from.
wallpaper or drywall over top. it is really easy to take down though.
Can you use the liner method in lieu of mudding and sanding the panels? I’m looking to texture and paint and drywall poses additional problems (as you mentioned).
yes, the liner gives you a fresh start in most cases. i did run into a problem once where the joint between two panels was bulging out a bit, so i did 2 layers if liner to hide it.
Will the liner ruin the wood paneling underneath? I have knotty pine walls & I’m curious if they will still be okay if the wallpaper gets torn down some day..
I wouldn’t put it on if you were worried about preserving your paneling. I bet a steamer could get it off though. You would want to check with the manufacturer on that to be sure.
I have real pine paneling and the grooves are deep do you think the liner will cover them or will i have to put a second layer of the liner?
You’ll have to try a layer first and see how it does. But it sounds like you might need multiple layers
If I go the wallpaper liner route, do I need to prime on knotty pine paneling (glossy)? It is in a basement and prefer not to use anything other than latex based products. Can this be accomplished?
mine was glossy and the liner stuck to it just fine.